Go Live with the SaaS Survey Pack
Deploying the SaaS Survey Pack takes about 10 minutes. You will review pre-built survey timing, adjust any defaults that do not fit your product, and activate the surveys.
Before you start
Section titled “Before you start”- You need a Pulseahead project with the script installed, or you can complete that in Step 1 below.
- You need access to your application’s codebase to add or update the script tag.
Step 1: Install the script and identify users
Section titled “Step 1: Install the script and identify users”If you have not installed Pulseahead yet, add the script to your application first.
- In the Pulseahead dashboard, open Embed from the sidebar and copy your project’s snippet.
- Paste it into the
<head>or at the end of the<body>of your application.
window.pulseahead("config", { projectId: "YOUR_PROJECT_ID" });Once the script is installed, identify signed-in users. This step is required for pack timing and the metrics dashboard to map survey responses to real accounts.
// Call this after you know the current user (logged-in context)window.pulseahead("identify", "user_123456", { plan: "pro", role: "admin",});For full details on when to call identify, optional attributes, and framework-specific examples, see Identifying users.
Step 2: Review and adjust survey triggers
Section titled “Step 2: Review and adjust survey triggers”Open the SaaS Survey Pack setup wizard from the dashboard (SaaS Survey Pack → Review & Adjust Survey Triggers).
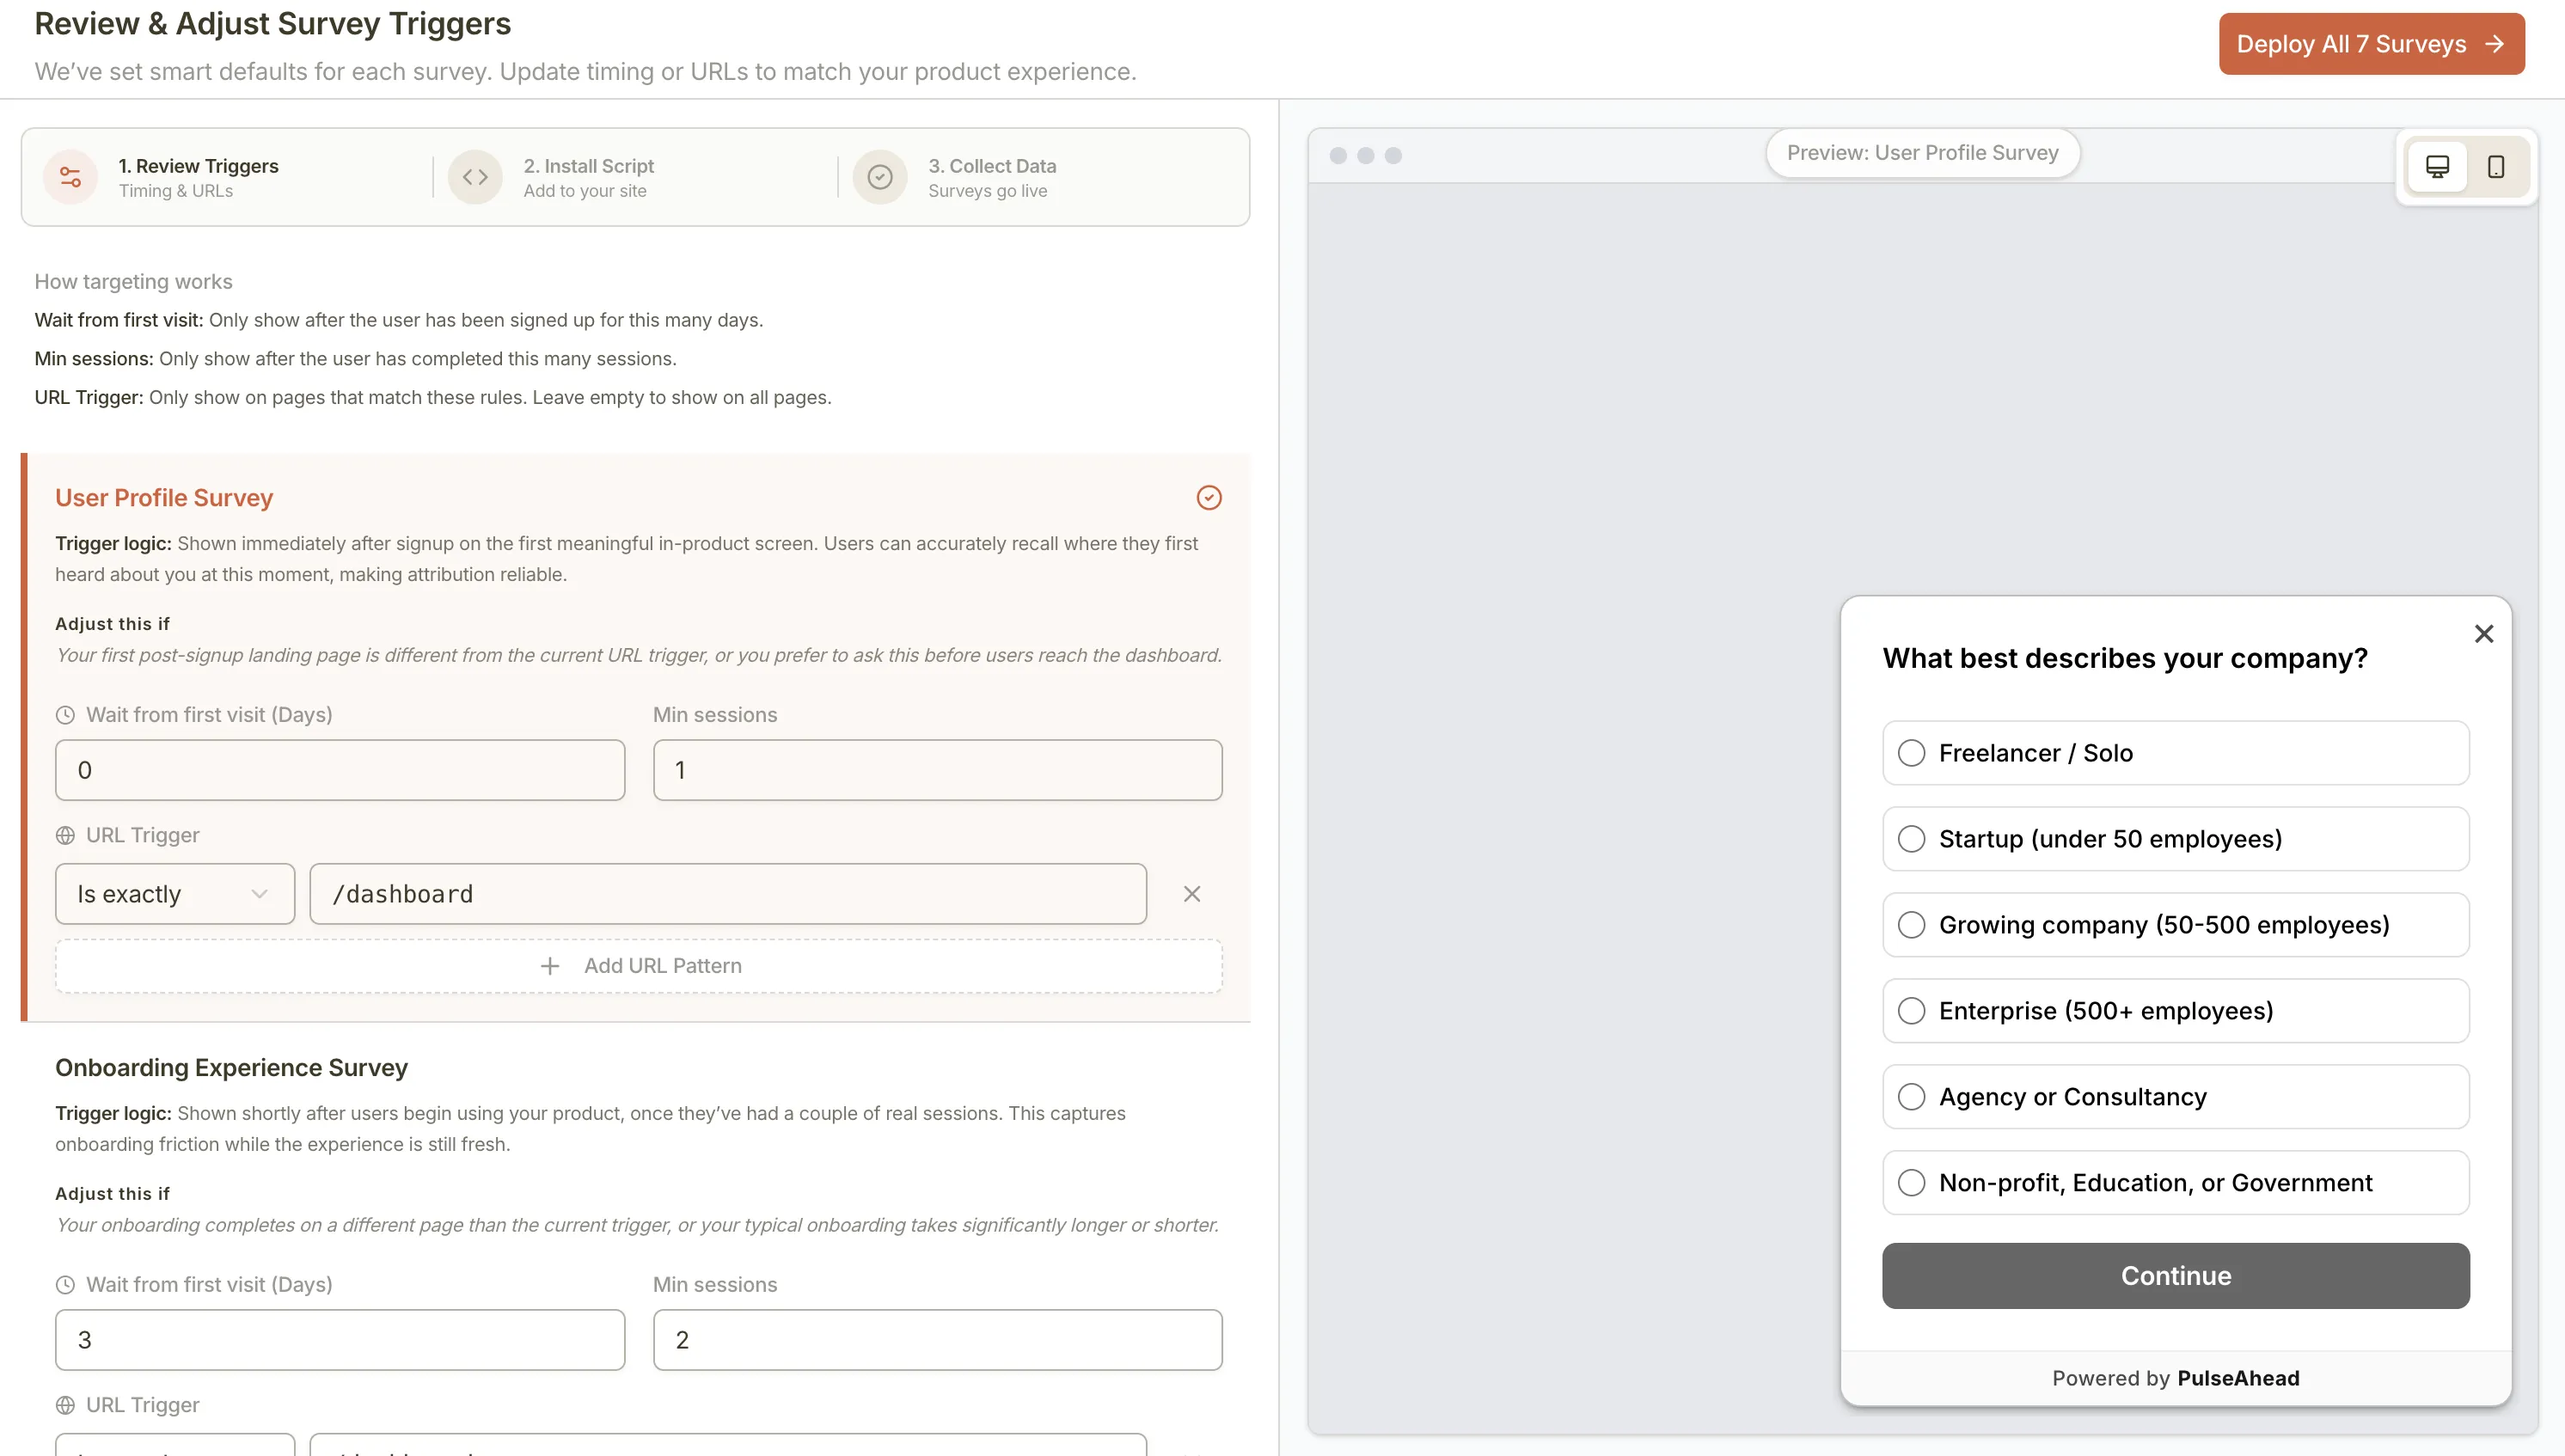
Pulseahead sets smart defaults for each survey based on typical SaaS lifecycles. For each survey card in the wizard, you can adjust:
- Wait from first visit (days): How long after a user’s first visit before the survey is eligible to show.
- Min sessions: Minimum number of sessions (24 hours apart) before the survey is eligible.
- URL trigger: Which URL patterns the survey is allowed to appear on. You can add, edit, or remove patterns.
Each card includes Trigger logic and Adjust this if notes to help you decide what to change.
Common defaults you may want to change
Section titled “Common defaults you may want to change”| Survey | Default trigger | When to change it |
|---|---|---|
| User Profile | Early, on paths like /dashboard | Adjust if your post-signup home is at a different path |
| PMF | Day 14+, minimum 6 sessions | Extend if your product has a longer time-to-value |
| Churn | Cancel or downgrade URLs | Update if your cancellation flow uses different paths |
After the pack is deployed
Section titled “After the pack is deployed”Once the pack is live, you can access the full configuration surface for any survey by opening it in the survey editor:
- Targeting tab: URL patterns, min sessions, segments and user attributes, device, browser, OS, and location filters (availability depends on your plan). See Audience Targeting and User segments.
- Behavior tab: Page delay before the survey appears, cooldown overrides, re-survey rules, and manual trigger. See Behavior & Frequency.
Step 3: Activate and monitor
Section titled “Step 3: Activate and monitor”After you complete the wizard, surveys are created in an active state by default.
- If you prefer a gradual rollout, toggle the individual survey toggle from the survey list to off until you are ready.
- Running all six surveys is recommended, but starting with a subset (for example, Onboarding and Churn) is a valid starting point.
- Global cooldown spaces out how often any single user sees surveys across your project. Surveys like Churn can be set to bypass this cooldown when immediate collection matters. See Behavior & Frequency for details.